When You Pipe to a Head, the "Snap" Point is Wrong
Issue
When you pipe to a sprinkler head in your design, the "snap" point seems to be incorrect.
The lateral pipe is not snapping to the center of the head as it's supposed to, as in the image to the right.
Are your pipes not snapping to some or all of your heads when you use the XHair or Ortho setting? If so, here's what to do.

Cause
This issue can occur for several possible reasons:
- You may have a Z elevation set to the equipment block you are trying to pipe to (or move using our Move Piped Equipment tool).
- The drawing units in your irrigation plan may have changed, which would have effectively rescaled your drawing and, in turn, prevented your pipes from snapping to heads correctly.
- The Base Angle may be set incorrectly in your irrigation plan.
- A number of deeper drawing issues can also prevent pipe from snapping to heads correctly.
Whether or not this issue is related to your drawing units, it's supremely important to avoid changing your units in a plan after you've completed any work within that plan that you want to keep.
Solution
Step 1: Check for a Z elevation.
Select one of the heads or other pieces of equipment that is having the issue.
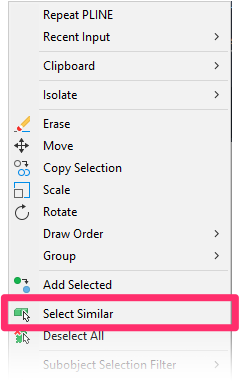
Right-click and choose the Select Similar option from the menu that opens.
All instances of that block type will be selected in your drawing.
Open the Properties panel by typing PROP in the Command line and pressing Enter.
Check the Position Z entry in the Properties panel. If it reads *VARIES* or shows a number other than 0, one or more of the selected blocks has a Z elevation, which may be causing the issue.
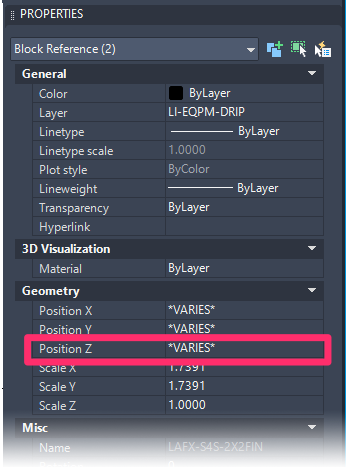
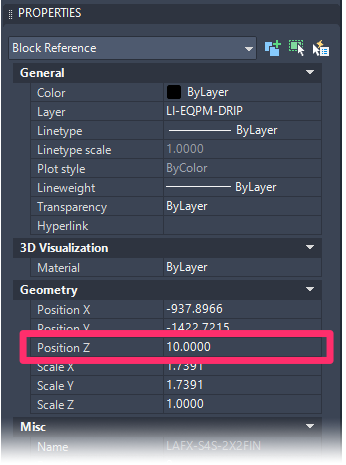
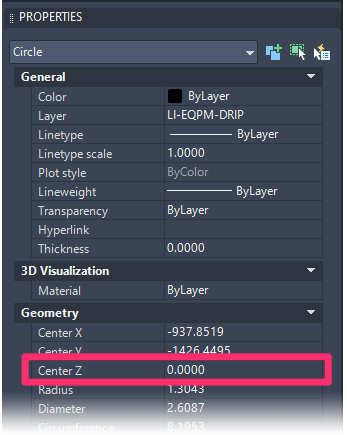
If you see *VARIES* or a number other than 0 in the Z Position entry, change it to 0 to eliminate the Z elevation.
After changing this entry to 0, try piping to the head or other piece of equipment that was causing the issue. Is the pipe snapping correctly?
- Yes: You've resolved the issue.
- No: Move on to the next step.
Step 2: Verify that your drawing units are set correctly.
Type UNITS in the Command line, and press Enter to open the Drawing Units dialog box.
Verify that the Length and Insertion Scale menus are set to the correct unit types for your drawing (Decimal/Feet, Architectural/Inches, etc.).
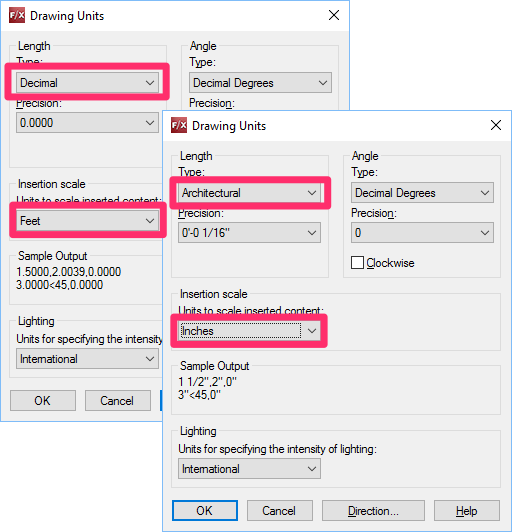
If the units are set incorrectly, you have three options for correcting the issue:
Option 1: Readjust the pipe endpoints as necessary.
Option 2: Try rescaling the drawing to compensate for the units setting.
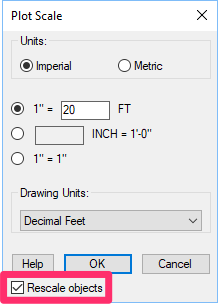
For example, if the plan was originally in Architectural Inches but it's been erroneously changed to Decimal Feet, rescale everything back down 1/12 using our Scale tool, making sure to check the Rescale Objects box. Then work in Decimal Feet for the duration of the plan.
The scale you set at this point will depend on the original scale you set for your drawing.
This option may or may not work in your particular irrigation plan. Above all, avoid changing your units in the middle of a plan.
Option 3: Correct the drawing units, delete the problematic heads, type PRG to purge them from the drawing, and place them again.
If the pipes are still not snapping to heads correctly after you've tried one of these options, move on to the next step.
Step 3: Verify that your UCS is set correctly.
Something may be off with a User Coordinate System (UCS) in your drawing. Try setting a new UCS. (You may need to set your drawing back to WCS and then set your new UCS.)
Pipes still snapping incorrectly? Move on to the next step.
Step 4: Confirm that your base angle is set to east.
Type UNITS in the Command line, and press Enter to open the Drawing Units dialog box.
Click Direction.


The Direction Control dialog box will open.
Select the East option under Base Angle and click OK.
It's rare for the Base Angle to be set incorrectly. This step is a quick check just in case.
If your Base Angle is set to East and your pipes are still snapping incorrectly, move on to the next step.
Step 5: Account for deeper issues within your drawing.
If your units, UCS, and Base Angle are set correctly and your pipes are still snapping incorrectly, the issue may be springing from any number of deeper issues with your drawing, including:
- The symbol family may have been changed after the placement of some of the heads.
- The head blocks may have been edited with the Block Editor.
- The name of the layer where you have placed the problematic heads may have changed after you have placed the heads.
To address these issues, complete the following steps:
1. Start a fresh drawing, and set it to the same scale and same Land F/X project as the original drawing.
2. Place the same head that is creating problems.
3. Use the WBLOCK command to save a copy of the head block.
Need help with this step? See our WBLOCK instructions.
4. In the new drawing, type Insert in the Command line and insert the head block.
5. Use our Redefine Block command to redefine the head block.
Need help with this step? See our Redefine Block instructions.
The system should now be able to pipe to the heads correctly.
You can also try purging all instances of the problematic heads out of the original drawing, but this is usually not an option.


